The Segments panel

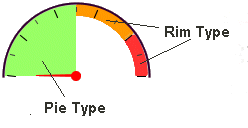
The segments panel allows you to create coloured segments that can be displayed on the surface of your widget. Segments can be of a pie type or a rim type (see examples below).

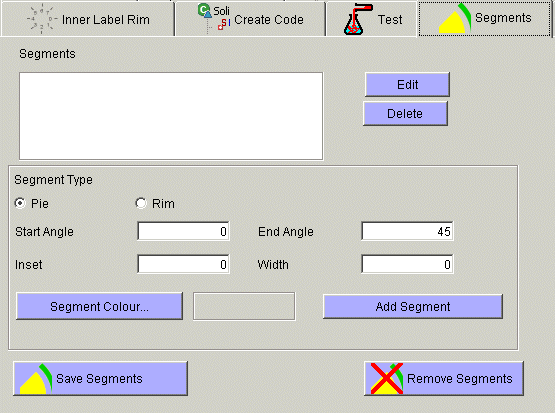
At the top of the panel is a list which shows a summary of the segments that you have added and two buttons to edit and delete these items in the list. Below this is a panel which allows you to set the details for each segment. Pressing the edit button on the list will place the details of the selected item in the list into this panel. Pressing the add button on this panel will replace the entry in the list.
- Segments list - Summary list of segments entered
- Edit button - Edit details of selected item in list
- Delete Button - Delete details of selected item in list
- Type (pie or rim) - pie segments are filled arcs which extend out from the centre of the widget, rim segments are filled arcs
- Start Angle - the start angle of the segment
- End Angle - the end angle of the segment
- Inset - the number of pixels in from the edge of the widget that the segment starts at.
- Width - the width of the segment (rim style segments only)
- Colour - the Colour of the segment
Note that the 'Remove rim' button will not actually get rid of your work on the tick rim. You can put the rim back on the illustrative display (and into the generated code) simply by pressing the 'Save Changes' button again.


